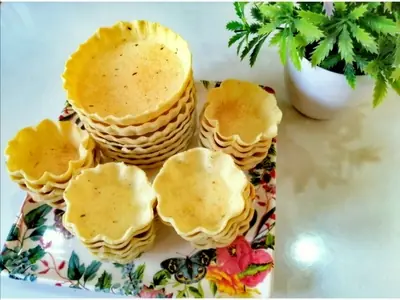
Pie Crust With Olive Oil: Why It’s Better Than Butter
Introduction
Did you know that many of home bakers say pie crust is the single most intimidating part of making a pie? If cold butter, ice water, and a food processor have ever stressed you out, it’s time to rethink your pie crust entirely. Olive oil pie crust flips the script on traditional pastry — no chilling, no cutting in butter, and no fear of overworking the dough. It’s faster, more forgiving, and just as flaky as the classic version, whether you’re making a sweet fruit pie or a savory tart. In this guide, we’ll walk through exactly why this method outperforms butter, plus everything you need to make a perfect olive oil pie crust from scratch.
Table of Contents
Ingredients List
- 250g all-purpose flour (plus extra for rolling)
- Pinch of salt
- 250g olive oil (extra virgin olive oil works great)
- 60g cold water (adjust as needed)
- 1 egg
- Thyme
Timing
- Prep time: 10 minutes
- Rest time: 15 minutes (no lengthy chilling required)
- Bake time: 15–45 minutes, depending on your filling
- Total time: About 30–60 minutes
Compared to traditional butter pie dough, which typically requires at least 1–2 hours of chilling before it’s workable, olive oil Pie dough cuts your prep time, making it one of the fastest scratch-made crusts you can put together on a weeknight.
Step-by-Step Instructions
- Mix the dry ingredients:
In a large bowl, whisk together the flour, salt, and thyme until well combined. - Add the olive oil:
Pour the olive oil and 1 whole egg into the flour mixture. Use a fork or pastry cutter to mix together until the mixture resembles coarse breadcrumbs. - Add the water:
Slowly add the cold water, 1 tablespoon at a time, mixing gently after each addition. Add just enough water to hold the dough together. You don’t want it to be too wet. - Shaping the Dough:
Place the dough on a floured surface. Gently knead it a few times until it forms a ball. - Rolling the Dough:
Roll the dough into a circle about 1/8 inch thick. If the dough sticks, sprinkle a little flour on the surface or the dough itself. - Place in a Pie Pan:
Carefully transfer the rolled dough to a pie pan (preferably a 9-inch one). Trim off any excess dough and crimp the edges with your fingers or a fork. - Refrigerating (optional):
For best results, refrigerate the dough for 15-30 minutes to help it firm up before baking. - Baking (if needed):
If you are making a pie that requires a pre-baked crust (such as a cream pie), preheat the oven to 375°F (190°C). Prick the bottom of the dough with a fork several times, then bake for 12-15 minutes until golden.
Nutritional Information
Per serving (1 of 8 slices, crust only):
| Nutrient | Amount |
|---|---|
| Calories | ~180 kcal |
| Total Fat | 12g |
| Saturated Fat | 1.7g |
| Carbohydrates | 16g |
| Protein | 2g |
| Sodium | 220mg |
Compared to an all-butter crust, olive oil pie crust contains roughly 60% less saturated fat per serving, while still delivering a comparable calorie count — largely thanks to olive oil’s heart-healthy monounsaturated fat profile.
Serving Suggestions
This olive oil Pastry crust is versatile enough to pair with both sweet and savory fillings:
- Fill it with a classic apple or berry filling for a rustic, farmhouse-style dessert.
- Use it as the base for a Mediterranean-inspired tomato and feta tart.
- Try it with a creamy quiche filling — the subtle olive oil flavor complements eggs, herbs, and cheese beautifully.
- Serve slightly warm with a scoop of vanilla bean ice cream for sweet pies, or a simple arugula salad alongside savory tarts.
Common Mistakes to Avoid
- Using a strong, bitter olive oil — this can overpower delicate fillings. Stick to a mild, fruity extra virgin olive oil.
- Overworking the dough — this activates too much gluten, leading to a tough, chewy pie crust instead of a tender one.
- Skipping the rest period — even 15 minutes helps the dough relax and roll out evenly.
- Adding too much water — this makes the dough sticky and difficult to transfer. Add water gradually and stop as soon as it holds together.
- Rolling too thin or too thick — aim for a consistent ⅛-inch thickness to ensure even baking and a crisp, flaky finish.
Storing Tips for the Recipe
- Unbaked dough: Wrap tightly in plastic wrap and refrigerate for up to 3 days, or freeze for up to 3 months.
- Baked crust (unfilled): Store at room temperature in an airtight container for up to 2 days, or freeze for up to 1 month.
- Filled, baked pie: Cover loosely and refrigerate for up to 4 days, depending on the filling.
- Reheating tip: To restore crispness, warm baked pie in a 300°F oven for 10 minutes rather than using a microwave.
Conclusion
Olive oil pie crust is a faster, healthier, and remarkably forgiving alternative to traditional butter pastry. It delivers a tender, flaky texture with minimal effort and no chilling required. Give it a try in your next pie, share how it turned out in the comments below, and subscribe for more foolproof baking guides.
FAQs
Is olive oil pie crust as flaky as butter pie crust? It’s tender rather than layered-flaky, but many bakers find the texture just as satisfying — and far more consistent, since there’s less risk of overworking the dough.
Can I use regular olive oil instead of extra virgin? Yes, though extra virgin olive oil offers a fuller flavor and better nutritional profile. Choose a mild variety for the best results.
Why doesn’t this dough need to be chilled like traditional pie crust? Because olive oil is already liquid at room temperature, there’s no solid fat that needs to firm up before rolling, unlike butter-based dough.
Can I make this pie crust ahead of time? Absolutely. The dough keeps well in the refrigerator for up to 3 days or in the freezer for up to 3 months.
Is this recipe suitable for savory pies? Yes — simply omit the sugar, and the subtle, savory depth of the olive oil pairs beautifully with quiches, tarts, and hand pies.
Give Me Your Opinion, Please?
There are no reviews yet. Be the first one to write one.